Build Introduction
This is your comprehensive guide for building a Werewolf thunder god who smites their enemies with blasts of lightning as they cower before him. Welcome to the Lightning Storm Werewolf build. This build focuses on using the unique  Tempest Roar helmet to summon the power of a
  Lightning Storm in Werewolf form to terrorize the hordes of hell with unending bolts of lightning.
Our guide will cover all basic mechanics and deep dive into the optimal setup for skills, Paragon points, and gear for the build.  Ahavarion, Spear of Lycander Below, you will find a supporting YouTube video as well to showcase the build in action.
- Amazing AoE damage
- Incredible Spirit Regeneration
- Unstoppable for 6 seconds when Grizzly Rage is triggered
- Low Cooldown for Grizzly Rage
- Highly dependent on Ultimate skill
- Requires you to manage your distance
- Requires minor Cooldown management
Season of the Malignant
Season 1 Patch Updates
Below is a list of specific changes from the Season 1 Patch Update that affect this build. If any of these changes create significant issues within the build, they will be discussed in more detail under their relevant sections.
- Aspect of Disobedience maximum stacks reduced from 100 to 60, reducing maximum Bonus Armor % from 25-50% to 15-30%.
- Prime Grizzly Rage now grants Unstoppable for 6 seconds instead of while active.
- Masochistic now also requires a Lucky Hit chance of 75%.
- Cooldown Reduction: Reduced by ~30% on gear slots.
- Significant reductions to Vulnerable and Critical Strike Damage values (needs to be tested more).
The Season 1 Patch Update additionally included several changes to damage types, both buffs and nerfs, but also reductions have been made to the amount of Damage Reduction that can be acquired through this build. None of these changes are build-breaking and we still have full confidence in this build.
Malignant Hearts
The theme for Season 1 introduces a new form of legendary gem called Malignant Hearts. There are three types of hearts that need to be socketed into matching colored sockets on all equipped jewelry and one type of heart that can be placed into any socket. For more information about the Malignant Hearts theme for Season 1 check out our Malignant Hearts guide.
Listed below are the Malignant Hearts that are useful for this build, ranked by importance. Stats displayed reflect what a level 20 character would receive as a drop. Note that this list is based on our early opinions on the Malignant Hearts, and we will update it as and when it is necessary.
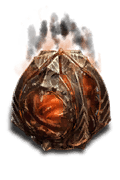 Caged Heart of the Picana
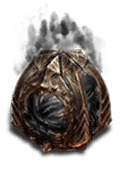 Caged Heart of the Unconstrained Beast
 Caged Heart of the Malignant Pact
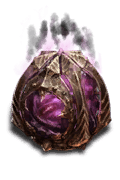 Caged Heart of Inexorable Force
 Caged Heart of Tempting Fate
 Caged Heart of the Agitated Winds
 Caged Heart of the Dark Dance
 Caged Heart of Revenge
 Caged Heart of The Barber
If you are confused by anything in our guide or have any questions, join the livestream and ask our writer!
Skill Tree Points and Skill Bar
Follow the points allocated in the image above for the complete 58 point build. The additional 10 skill points are completed using the Renown system.
If you are still leveling up to Level 50, points should be prioritized to raising  Poison Creeper to 5/5 and adding the two enhancements as soon as possible. Once you have completed those seven points, focus on putting points into
  Call of the Wild. Keeping your
  Poison Creeper as strong as possible will be key to leveling effectively.
| Priority Skills | Cluster |
|---|---|
 Wind Shear Level 1, Wind Shear Level 1,  Enhanced Wind Shear and Enhanced Wind Shear and  Lightning Storm Lightning Storm |  Basic Skill Basic Skill |
 Lightning Storm Level 5, Lightning Storm Level 5,  Enhanced Lightning Storm, Enhanced Lightning Storm,  Raging Lightning Storm, Raging Lightning Storm,  Heart of the Wild Level 1, Heart of the Wild Level 1,  Wild Impulses Level 3, Wild Impulses Level 3,  Predatory Instinct Level 1, Predatory Instinct Level 1,  Digitigrade Gait Level 3 Digitigrade Gait Level 3 |  Core Skill Core Skill |
 Cyclone Armor Level 1, Cyclone Armor Level 1,  Enhanced Cyclone Armor, Enhanced Cyclone Armor,  Preserving Cyclone Armor, Preserving Cyclone Armor,  Blood Howl Level 1, Blood Howl Level 1,  Enhanced Blood Howl, Enhanced Blood Howl,  Innate Blood Howl, Innate Blood Howl,  Ancestral Fortitude Level 1, Ancestral Fortitude Level 1,  Vigilance Level 3 Vigilance Level 3 |  Defensive Skill Defensive Skill |
 Nature’s Reach Level 3 Nature’s Reach Level 3 |  Companion Skill Companion Skill |
 Hurricane Level 1, Hurricane Level 1,  Enhanced Hurricane, Enhanced Hurricane,  Savage Hurricane, Savage Hurricane,  Elemental Exposure Level 3, Elemental Exposure Level 3,  Endless Tempest Level 3, Endless Tempest Level 3,  Bad Omen Level 1, Bad Omen Level 1,  Electric Shock Level 3, Electric Shock Level 3,  Neurotoxin Level 1, Neurotoxin Level 1,  Envenom Level 3, Envenom Level 3,  Toxic Claws Level 1 Toxic Claws Level 1 |  Wrath Skill Wrath Skill |
 Grizzly Rage, Grizzly Rage,  Prime Grizzly Rage, Prime Grizzly Rage,  Supreme Grizzly Rage, Supreme Grizzly Rage,  Defiance Level 3, Defiance Level 3,  Circle of Life Level 3 Circle of Life Level 3 |  Ultimate Skill Ultimate Skill |
 Earthen Might Earthen Might | Key Passives |
Spirit Boons – The Druid Specialization
Boons are additional buffs provided to the Druid class as part of their specialization. To unlock your Boons, you will need to complete a simple quest on the west side of the map in the stronghold of “Tur Dulra”. This becomes available at level 15 and should be completed as soon as possible. The Boon mechanic allows you to pick a single buff from each of the corresponding master animals and the addition of a second Boon buff from a chosen master animal you select.

If you are still leveling to 50, you will gain the most benefits from once again focusing on enhancing your  Poison Creeper skill as much as possible. The Boon setup in the chart below allows for Lucky Hit Strikes to have a chance to reset the cooldown of the Poison Creeper skill through the Boon Packleader.
| Boon Name | Master Animal | Effect |
|---|---|---|
| Wariness | Deer | Take 10% reduced damage from Elites |
| Scythe Talons | Eagle | Gain 5% increased Critical Strike chance |
| Packleader | Wolf | Lucky Hit: Critical Strikes have a 20% chance to reset companion skills |
| Energize | Wolf | Lucky Hit: Dealing damage has up to a 15% chance to restore 10 spirit |
| Masochistic | Snake | Lucky Hit: Critical Strikes with Shapeshifting skills have a 75% chance to heal you for 3% maximum life. |
If you are in the endgame and have completed the skill tree as shown above, utilize the following set of Boons for the best results.
| Boon Name | Master Animal | Effect |
|---|---|---|
| Wariness | Deer | Take 10% reduced damage from Elites |
| Scythe Talons | Eagle | Gain +5% increased Critical Strike Chance |
| Calamity | Wolf | Extend the duration of Ultimate skills by 25% |
| Calm Before the Storm | Snake | Lucky Hit: Nature Magic Skills have up to a 10% chance to reduce the Cooldown of your Ultimate Skill by 2 seconds. |
| Masochistic | Snake | Lucky Hit: Critical Strikes with Shapeshifting skills have a 75% chance to heal you for 3% maximum life. |
As with many other Druid builds, we are going to use the Boon Calamity to help extend our  Grizzly Rage. This Boon is our first of two pillars for keeping our Cooldown on Grizzly Rage as low as possible during the endgame. We will also rely on the Boon Calm Before The Storm to drive down the Cooldown timer as much as possible. With the new balance patch changes for Season One, having Grizzly Rage up constantly might no longer be possible. We will be doing a full round of testing once Season One begins and provided updates for the best result.
Paragon
We recommend using these Legendary nodes and Rare Glyphs to truly take this build into the endgame. Note that each Rare Glyph’s information listed below is for the level 21 version.
| Name | Effect |
|---|---|
 Werewolf Werewolf | – For every 5 Willpower purchased within range, you deal +[6.24]% increased damage while in Werewolf form. – Additional Bonus unlocked after 40 Willpower points are purchased in the glyph’s range: You gain 10% damage reduction while in Werewolf form. |
 Keeper Keeper | – Grants +[125]% bonus to all Rare nodes within range. – Additional Bonus unlocked after 25 Intelligence points are purchased in the glyph’s range: You and your Companions deal x10% increased Non-Physical damage. |
| Heightened Malice | – While there are 3 or more poisoned enemies nearby, you deal 45% increased damage. |
 Exploit Exploit | – For every 5 Dexterity purchased within range, you deal +[3.85]% increased damage to Vulnerable targets. – Additional Bonus unlocked after 25 Dexterity points are purchased in the glyph’s range: Dealing damage to a Vulnerable enemy increases your damage by x1% for 6 seconds, up to x10%. |
| Ancestral Guidance | – After spending 75 Spirit, you deal 30% increased damage for 5 seconds. |
 Fulminate Fulminate | – For every 5 Dexterity purchased within range, you deal +[10]% increased Lightning damage. – Additional Bonus unlocked after 25 Dexterity points are purchased in the glyph’s range: You deal x12% increased Lightning damage to both Healthy and Injured enemies. |
| Thunderstruck | – Storm Skills deal 30%[x] increased Critical Strike Damage against Vulnerable or Immobilized enemies. |
 Earth and Sky Earth and Sky | – Grants +[150]% bonus to all Magic nodes within range. – Additional Bonus unlocked after 40 Willpower points are purchased in the glyph’s range: Radius Bonus: Nature Magic Skills deal x10% increased damage to Crowd Controlled or Vulnerable enemies. |
Let’s break down each of these beneficial Nodes and where our Paragon Points are positioned in each of the Paragon Boards we use. This part of the build is present in an order of importance. If you do not have enough Paragon Points for use in your Paragon Board, just slowly work towards each step.
Starting Board

- Begin with by selecting the Nodes on the left hand side of the board towards the Rare Node Tenacity. This will give us a Life increase.
- Path through the Magic Nodes continuing upwards to the Glyph slot and insert
 Werewolf. in the center of the starting Board. This will give us a raw damage boost while in Werewolf form
 - Select the Willpower nodes as shown above and pick up both Rare Nodes inside the Glyph radius, Impel and Resolve. These two nodes will help with a damage boost and some resistances.
- Come back down and complete the Rare Node Prime. This choice is nice little boost to flat damage.
- Finally, head towards the top of the Paragon Board and attach the Heightened Malice Board in the same position as you see in the image below.
Heightened Malice (2nd Board)

- Immediately path to the left hand side of the board and follow the pathway to the Glyph slot. Insert the Glyph
 Keeper, this Glyph is used to amplify the two Rare Nodes that we pick up next.
 - Follow the image above and select two Rare Nodes, Nature-born and Sinking Fangs, these nodes will boost our offensive and defensive capabilities towards poisoned enemies.
- Now path up on the right hand side of the take the Rare Node Overturn, this will boost our damage to poisoned enemies and elites.
- Continue up towards the Legendary node Heightened Malice, remembering to select the magic nodes nearby it.
- Now path towards the right hand side of the board and connect our next paragon board Lust for Carnage.
Lust for Carnage (3rd Board)

- Path upwards towards the Glyph slot on the board. Insert the
 Exploit. Focus on the surrounding area for the Dexterity bonus for the Glyph. This glyph is huge for keeping enemies Vulnerable as well as significant damage boost towards them.
 - Pick up the Rare Node Feral and the Magic Nodes that amplify our Werewolf damage.
- Pick up the Rare Node Regenerative as well, but do not continue up the board at this time.
- Instead take the path to the bottom of the board and attach our next paragon board, Ancestral Guidance.
Ancestral Guidance (4th Board)

- This board is quite simple, take the single rare node Reclamation on the way towards the Legendary Node Ancestral Guidance.
- Reclamation is a major component to keeping our Spirit full as we slaughter enemies.
- Now head back to the previous board, Lust for Carnage and path upwards to the top connection point
- Head to the bottom of this Board and attach our next Paragon Board, Constricting Tendrils.
Constricting Tendrils (5th Board)

- Head towards the Glyphs slot and insert
 Fulminate, this Glyph will amplify our Lightning damage.
 - Now target the two Rare Nodes, Courage and Nature’s Will. Be sure to select all the Dexterity nodes shown above to maximize your Lightning damage increases.
- Finish off by going to the left hand side of the board and attaching our final board, Thunderstruck.
Thunderstruck (6th Board)

- As you can see this board we have two entry points. To start return to the paragon board, Heightened Malice.
- Follow the pathway up into the paragon board Thunderstruck and head towards the Rare Node Tempest. Take all the Magic Nodes surrounding it as well, this will boost our Critical Strike and Vulnerable Damage.
- Now enter the board on the right hand side and path towards the Glyph slot as shown above.
- Insert the Glyph
 Earth and Sky, be sure to take the Willpower from the left hand side of the Glyph radius to ensure you have enough for the bonus. This will give you more Nature Skill damage but also amplify our last two Rare Nodes.
 - Take Stormcaller and Hubris, these nodes will give us more damage for storm skills and some damage reduction again vulnerable enemies.
- This will complete your Paragon Tree with a good balance of defensive and offensive bonuses, now go blast some enemies.
Paragon board images courtesy of d4builds.gg.
Mechanics and Playstyle
The playstyle for the Lightning Storm Werewolf build is very similar to some of our previous builds. We start by building up our Spirit using our generator  Wind Shear, which will also put them into a vulnerable state. Once your Spirit is topped off activate your
  Grizzly Rage, which will trigger
  Vigilance and begin building up our fortified life. Additionally, your movement speed will be increase and your Spirit costs will be drastically reduced. Start spamming your core skill:
  Lightning Storm. Lightning Storm will quickly ramp up its AoE damage and keep your Spirit at its maximum while you melt enemies from a distance. Keep your
  Hurricane up and running as much as you can to keep your ranks of Lightning Storm higher.
If things get too crazy, drop your  Cyclone Armor on the enemies around for a small knockback and reposition yourself. Get back to slamming enemies with
  Lightning Storm. If you need a top of with Life, hit your
  Blood Howl and the bonus increase to Attack speed will increase your damage output for a short time. Now add in a
  Wind Shear attack to keep the enemies Vulnerable, this is very useless for any boss battles or challenging elites.
One final note, with this build you have several layers of defenses to keep your Damage Reduction at a high level so you can tank enemies while you use  Lightning Storm on top of yourself, all the while getting a bonus chunk of Life from the
  Dire Wolf’s Aspect with every Critical Strike.
Now that you understand the skill rotation and benefits, let’s look at some of the additional benefits our skills provide while using certain Legendary Aspects.
Blood Howl and Cyclone Armor
Both  Blood Howl and
  Cyclone Armor are defensive skills which benefit from using the
  Vigilance passive in our skill tree. This passive offers us 15% damage reduction whenever we cast either of these skills. Your best strategy is to balance the use of both skills for the 6 seconds of damage reduction at rank 3. Keeping the Vigilance buff active during endgame activities will be essential to you staying alive.
Hurricane
 Hurricane utilizes the
  Stormshifter’s Aspect so you can benefit from the +2 boost to all ranks of your shapeshifting skills, which because of the unique helmet
  Tempest Roar will include your storm skills.
Grizzly Rage
This skill is paramount to the build; you cannot push endgame content with an effective setup to use with your  Grizzly Rage. To create an effective setup for endgame, we will equip three specific Legendary Aspects:
  Aspect of the Rampaging Werebeast and
  Dire Wolf’s Aspect.
First,  Dire Wolf’s Aspect alters the werebear only skill to be performed as a Werewolf, offering Movement Speed instead of Damage Reduction as well as a huge amount of Spirit Cost Reduction. This reduction is one of the main keys to us being able to spam
  Lightning Storm.
Next,  Aspect of the Rampaging Werebeast focuses on not only extending the uptime for our
  Grizzly Rage to be active, but also builds up a staggering amount of Critical Strike Damage with each critical strike you make. By using this Aspect and focusing on Critical Strike Chance on our gear, we can effectively boost our Critical Strike Damage by over 500% – 1000%. This adds a huge damage boost for running endgame content.
Overall, the build’s playstyle is simple to follow: build up your Spirit to maximum and pop  Grizzly Rage, then start the non-stop
  Lightning Storm spam. Use your defensive skills to keep yourself standing strong and pop
  Blood Howl for more Spirit to keep the pressure up. All of our boons will keep our Grizzly Rage Cooldown at a minimum. As for your Spirit, you will benefit from the reduction of Spirit costs while in Grizzly Rage but also the Key Passive
  Earthen Might will keep you at full Spirit constantly.
Gear Choice and Stat Priority
As you begin to farm in World Tier 3 and 4, Rare and Legendary item drops will begin to appear with some regularity depending on your luck. We recommend saving the targeted Legendary items that have the needed Legendary aspects listed below. We also recommended to keep multiple copies of the build’s Aspects in your Stash for future upgrades.
As for the Rare items, you will need to inspect each one for targeted affixes for use in each specific slot and do your best to match the recommended rolls. We have listed our targeted affixes in order of importance. Check the chart below and make note of what affixes you are searching for when you see a Rare gear piece drop.
| Gear Slot | Targeted Affixes |
|---|---|
| Helm | 1. Cooldown Reduction 2. Maximum Life 3. Total Armor 4. Willpower 5. Life on Kill |
| Chest | 1. Damage Reduction while Fortified 2. Damage Reduction from Poisoned Enemies 3. Damage Reduction from Close Enemies 4. Damage Reduction from Distant Enemies 5. Maximum Life 6. Flat Damage 7. Willpower |
| Gloves | 1. Rank up  Lightning Storm Lightning Storm2. Lucky Hit Chance 3. Critical Strike Chance 4. Werewolf Critical Strike Damage 5. Lightning Critical Strike Damage |
| Pants | 1. Damage Reduction while Fortified 2. Damage Reduction from Poisoned Enemies 3. Damage Reduction from Close Enemies 4. Damage Reduction 5. Damage Reduction from Distance Enemies 6. Maximum Life 7. Willpower |
| Boots | 1. Movement speed 2. Total armor while Werewolf 3. Damage Reduction while Injured 4. Willpower 5. Movement Speed for 4 seconds After Killing an Elite |
| Amulet | 1. Rank up  Envenom passive Envenom passive2. Cooldown reduction 3. Total armor while Werewolf 4. Damage Reduction while Fortified 5. Damage Reduction from Close Enemies 6. Damage Reduction from Poisoned Enemies 7. Damage Reduction |
| Rings | 1. Lucky Hit Chance 2. Damage to Vulnerable enemies 3. Werewolf Critical Strike Damage 4. Critical Strike Damage 5. Lightning Critical Strike Damage 6. Critical Strike Chance 7. Damage to Close enemies 8. Damage to Poisoned enemies |
| 1-handed Weapon | 1. Damage to Vulnerable Enemies 2. Lightning Damage 3. Damage to Close Enemies 4. Core Skill Damage 5. Willpower |
| Totem | 1. Lucky Hit: Chance to Restore [X]% Primary Resource 2. Lucky Strike Chance 3. Critical Strike Chance 4. Spirit Cost Reduction 5. Willpower |
Please note that these affixes are the recommended picks for the Lightning Storm Werewolf build, but that is simply our opinion. Other affixes could certainly work instead of the ones listed above, but may not be optimal. There are several very specific affixes that are required to make the build work, they are as follows:
- Lucky Hit Chance
- Lucky Hits are the key to keeping out
 Ultimate Skill on the lowest cooldown possible. The Calm Before the Storm Boon needs Lucky Hit Chance to be high enough to effectively trigger regularly. If you ignore Lucky Hit Chance, you might be stuck with a longer cooldown on
  Grizzly Rage.
- Lucky Hits are the key to keeping out
- Cooldown
- On the topic of keeping our
 Ultimate Skill available at all times, this affix should be on as many gear slots as possible. The base cooldown for
  Grizzly Rage is 45 seconds, so lowering this timer will be key as you continue to push high-end content.
- On the topic of keeping our
Please note the recent Season One Balance changes have lowered the amount of Cooldown Reduction found on gear by 30%. This may cause this build to feel more sluggish while Cooldowns are finishing, we plan to revisit this once Season One begins.
A final point on acquiring the right affixes, Legendary Aspects or even Unique Items – use your Obols to target farm them. Obols are awarded from many different activities in the game, you will always stockpiling them until you hit your maximum. Instead of just randomly spending them on a random pick, use them to target what you might be missing from this build. It is a great way to target a specific slot of loot and find what you need.
If you are interested in checking out a new tool for gambling Obols check out this article below from Icy Veins.
Obol Gambling Optimization ToolLegendary Aspects
Listed below are all the best-in-slot Aspects found on Legendary Items that are important for the Lightning Storm Werewolf Druid build. Aspects from the Codex of Power can be used if you cannot find the proper Legendary drops, but they have weaker effects. Extract Aspects from lower level Legendary Items and imprint them onto better Rare Items with preferred stats. The endgame itemization goal will be to imprint Aspects with the best values Ancestral Rare items with Item Power above or as close to 800, then upgrade them through the Blacksmith. Each aspect is listed with its matching gear slot. Do your best to keep each aspect in the slot it was posted with.
| Gear Slot | Legendary Aspect | Legendary Aspect Power |
|---|---|---|
| Helm | Tempest Roar | Unique Helmet |
| Chest |  Vigorous Aspect Vigorous Aspect | Gain [10.0-15.0%] Damage Reduction while Shapeshifted into a Werewolf. |
| Gloves |  Dire Wolf’s Aspect Dire Wolf’s Aspect |  Grizzly Rage now shapeshifts you into a Dire Werewolf. As a Dire Werewolf you gain [15-25%] Movement Speed instead of Damage Reduction and a [30-50%] Spirit cost reduction bonus. In addition, kills Heal you for 10% of your Maximum Life. Grizzly Rage now shapeshifts you into a Dire Werewolf. As a Dire Werewolf you gain [15-25%] Movement Speed instead of Damage Reduction and a [30-50%] Spirit cost reduction bonus. In addition, kills Heal you for 10% of your Maximum Life. |
| Pants |  Aspect of Disobedience Aspect of Disobedience | You gain [0.25-0.50%] increased Armor for 4 seconds when you deal any form of damage, stacking up to [15.00-30.00%] . |
| Boots |  Stormshifter’s Aspect Stormshifter’s Aspect | While Hurricane is active, gain +2 Ranks to your Shapeshifting Skills. |
| Amulets(50% bonus) |  Aspect of the Rampaging Werebeast Aspect of the Rampaging Werebeast | The duration of  Grizzly Rage is increased by [1 – 5] seconds. In addition, Critical Strikes while Grizzly Rage is active increase your Critical Strike Damage by 10% for the duration. Grizzly Rage is increased by [1 – 5] seconds. In addition, Critical Strikes while Grizzly Rage is active increase your Critical Strike Damage by 10% for the duration. |
| Ring |  Mighty Storm’s Aspect Mighty Storm’s Aspect | The Earthen Might Key Passive also applies to your Storm Skills. |
| Ring |  Aspect of Retaliation Aspect of Retaliation | Your Core Skills deal up to [20-40%] increased damage based on your amount of Fortify. |
| 1-handed weapon |  Lightning Dancer’s Aspect Lightning Dancer’s Aspect | Lightning Storm Critical Strikes spawn 3 Dancing Bolts that seek enemies in the area dealing [X] Lightning damage. |
| Totem |  Overcharged Aspect Overcharged Aspect | Lucky Hit: Up to a [10-20%] chance when dealing Lightning damage to overload the target for 3 seconds, causing any direct damage you deal to them to pulse [X] additional damage to surrounding enemies. |
Unique Items
This build can function without the unique helmet  Tempest Roar, however it will dramatically alter the damage potential as you will no longer be in Werewolf form. Therefore, we believe the helmet is absolutely mandatory.

Gems
Listed below are the best gems to socket into gear for each slot type.
- Weapon:
 Royal Emerald for critical strike damage to vulnerable enemies.
 - Armor:
 Royal Sapphire for damage reduction while fortified.
 - Jewelry:
 Royal Skull for additional armor values.
Elixirs and Health Potions
Visit the Alchemist in any main town to craft helpful Elixirs that increase stats and experience gain for 30 minutes. Make sure to forage plants and pick up the necessary crafting materials during your adventures; they randomly spawn around the world. Use an Elixir providing any Resistance you need most, or the ![]() Assault Elixir to increase Attack Speed.
Assault Elixir to increase Attack Speed.
Return to the Alchemist again when you reach Level 20, 30, 45, 60, 70, 80 and 90, to upgrade your potion. The extra healing is essential to survival.
Changelog
- July 19th, 2023: Season of the Malignant section added.
- July 18th, 2023: Reviewed and altered build with Season One Patch Notes.

